Welcome

Welcome to video tutorials, a place which will provide you with simple and easy lessons concerning graphic design, photography, audio engineering, production, animation... Here, you can find tutorials on these subjects showing you how, in easy way, you can create what you want, with no trouble at all. There are new tutorials added every day! Hope you find these lessons useful!

Thursday, July 5, 2007

- Photoshop - Create Pineapple

Here's how you can create virtual Pineapple with just few steps...


1. Open up a new image any size and create a black circle;


2. Use the gradient tool, and create circular gradient with the colors #EADF87 and #DBBF43;


3. Create a new layer and fill it with black color.
Now go to "Filter -> Noise -> Add Noise" and put the slider to the maximum (400%)


4. Now add "Filter -> Blur -> Radial Blur" and set it to zoom and 100%;
Set it to overlay and press CTRL+G;


5. Now, delete a circle in the middle;


6. Select the Move-Tool and duplicate the pinapple-layer; Now while holding ALT, move the layer down.


7. Now press CTRL+U to darken, set saturation to about -47, lightness to -32, and it's finished!


There's Pinapple!

Wednesday, July 4, 2007

- Photoshop - Hitman entering the scene

Here's an easy way to make the "James Bond" effect of Hitman entering the scene...


1. Start of by creating document 500x400px. Now, create triangle using pen, and with the inside color #929292.


2. Contionue creating triangles...


3. Untill you finish full circle of them...


4. We'll use this shape picture of james bond,


which we will transform into this, by simply using black brush on white surfaces, and deleting white surfaces with background eraser tool...


5. Now, create new layer, and import the picture of the man entering the scene...


6. Add also a shadow under the man. We need to copy the background with man's silhouette and use Free Transform (by clicking the right button of the mouse on the background) and display the silhouettes on 180* vertically.Also, change the opacity – 71% on the inverted layer.


There it is!

- Photoshop - Wild Western / Desert Scene (video tutorial)

In this tutorial, you will learn how to create a wild western / desert scene using adobe photoshop.

- Photoshop - Advertisement designing (iPod Style)

This designing technique is very popular among commercials. Most famously iPod uses it all the time. Here's how to do it...


1. Open up any picture in interesting pose.


2. Now, cut the image and type Ctrl+C and Ctrl+V to paste the cuted image to another layer. Then, you erase the background with Background Eraser Tool.


3. Create new background layer with a soft color


4. Add your person to the background, press Ctrl+U, and hange lightness to +100%!


5. Now, duplicate the layer with the person, and press CTRL+I;


6. Place the black layer underneath the white one, and move it a bit, so it resembles a shadow.


7. For the final touch, make the layer which will be under the white layer, but on which you will draw something like this...


8. And for the final picture... Voila!


Tuesday, July 3, 2007

- Photoshop - Whitening Teeth (video tutorial)

This is a basic photoshop tutorial for whitening teeth. Using the quick mask it only takes about 5 minutes and is very effective.


- Photoshop - Pen Tool is All You Need (video tutorial)

The Photoshop Pen tool strikes terror into the hearts of many a PS user! This video shows some tricks to better understand and master the pen tool.


Sunday, July 1, 2007

- Photoshop - Text Picture (Create picture out of text)

You have all probably sometime seen picture that is entirely made of text. Here's how to do it...
For this lesson example, will use the same picture as in one of previous courses...


1. Go to "Image -> Adjustments -> Threshold", and move the slider left or right, untill you get satisfying picture...


2. Open the notepad, and type the words you want ito it like this:


3. Next, copy that text, and paste it in new text layer you have created.
After that, set up style and size of font, and rotate text untill you are satisfied.


4. Next, right click on text layer, and click "Resterise Layer". Select the template layer and with the magic wand at a tolerance of 32 select the white area. Go to select>similar to select all of the light areas and then select the text layer from the layers palette. Next select text layer, and hit delete to clear the excess text and drag the template layer into the bin icon. Back the image up in white by making a new layer (Go to "Layer -> New Fill Layer -> Solid Color") with a white fill and dragging it underneath the text layer.


There it is!
Beautifull!

- Photoshop - Frozen Text (Icy Effect)

This tutorial will show you how to make cool ice/frozen effect on your picture or text!
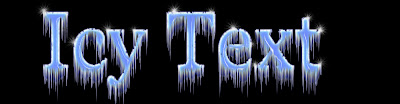
This example showes you how to do it on example text!


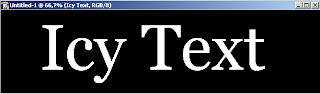
1. Start by opening new document with black bacground. Set white as your foreground colour, and black as your background colour (by hitting 'D', and then 'X' on you'r keyboard). Now, create new layer by hitting Shift+Ctrl+Alt+N. Use text tool, and add your text (it should be in white colour, on black background). I used "Icy Text" as an example.


2. Click on text layer, and then hold Ctrl button, and click the text layer in the Layers palette to make it a selection.
Now, in you'r menu, go to "Filter -> Noise -> Add Noise". (Click OK to the pop-up asking you if you want to rasterize.) Choose 150% and Uniform. Now hit Ctrl+D to deselect.


3. Go to "Filter -> Pixelate -> Crystalize" and choose Cell Size 3. Next, go to "Filter -> Stylize -> Find Edges". Hit Ctrl+I to inverse the colors!


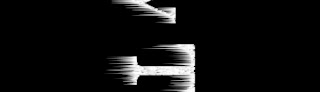
4. Go to "Edit -> ransform -> Rotate 90 CW".
Then, "Filter -> Blur -> Gaussian Blur" and choose 0.8 for the Radius.
Then, go to "Filter ->Stylize -> Wind" and pick Wind and From the Right.
Now, run the same wind filter a second time to get bigger icicles, and then go to "Edit -> Fade Wind". Move the Opacity slider to suite your preference. I decreased the Opacity to 90%, but you can set it to suit you'r needs.


5. Return you'r text in normal position by going yo "Edit -> Transform -> Rotate 90 CCW".
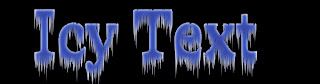
Create a new layer by hitting Shift+Ctrl+Alt+N. Select a light blue color you'd like to accent your ice with as you foreground color (I picked #3366FF). Fill the new layer with that color by hitting Alt+Backspace. Hold Alt and click between the blue layer and the text layer in the Layers Palette. The cursor should turn to into a symbol with two circles when you have it in the right place. With the blue layer still selected, go to the left drop-down menu above and change its Blending Mode to Overlay. Then, decrease the Opacity slider to suite your taste. (I opted for 60% in the example).


There it is! If you want snowy-icy effect, you can add sparkles here and there by using brush with that set as the type of brush (for more details read final step),and that is it!
If you want more blue-icy effect, you should procede reading this tutorial!


6. Create another new layer by hitting Shift+Ctrl+Alt+N. Hold Ctrl and click the layer with your text to load it as a selection. Fill the layer selection with a dark blue (I used #000761). Hit Ctrl+D to deselect. Set white as your background color. Go to "Filter -> Artistic -> Neon Glow". This part varies heavily with what the size and style of your text. Choose a middle blue color (I picked #002BD0). Move the Glow Size to about -8 and Glow Brightness to about 19.


7. Go to "Filter -> Artistic -> Plastic Wrap" and change the settings to your preference (I used Highlight Strength 8, Detail 14, Smoothness 7). In the Layers Palette, change the Blending Mode to Pin Light.


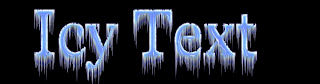
8. Final step is to add sparkles.
Set white as you foreground color and select the Paint Brush tool. In the Brush selector at the top, find the sparkle brushes (like i used on the picture).
Create a new layer on top and apply the brushes to a few areas near the top of your text, or as you prefer.


Finished!
And sooo easy!

- Lightwave 3D - Lightwave Tutorial

Node editor's displacement node from the lightwave official website.

- Gimp - Lightning

In this tutorial you will learn the basics of how to create a nice lightning effect. Once you know the basics, you can easily experiment to create different kinds of lightning.

- Gimp - User Interface

This video explains the user interface of the GIMP. The goal of the tutorial is to make you understand how the user interface works, so that you can explore GIMP without being hindered by the user interface.

- Photoshop - Worhol-like images (Pop art in Photoshop)

Create Worhol-like pop-art in easy way!
You can start with any image you like..


1. Isolate the portrait (picture) from the background by using "Filter -> Extract" from your menu bar. Then, you define edges, and fill in the picture you want to cut out.
You'll get something like this:


2. Go to "Image -> Adjustments -> Threshold", and move the slider left or right, untill you get satisfying picture...


3. Duplicate this layer, and will it with white.


4. Go back to the black and white layer and remove the white. >Select>Color Range... Select the White, hit OK.. then Delete.


5. Create a new layer and fill it with a color. "Layers -> New Fill Layer -> Solid Color"
By modifying color of each of three layers, you should be able to test various color combinations...


6. If you do previous step several times, you should get something like this:


Have fun!

- Photoshop - Recycled Da Vinci (Hiding picture within a picture)

Lear how to hide one picture within other!
Very practical and easy trick!


1. First, create a new image 2x2px and using the Pencil Tool (set to 1px), draw image as you can see it below.
Try to Zoom In ( View -> Zoom In ) to do it easier.


Define your pattern ( Edit -> Define Pattern ) and close the image.


2. Open two images. One you want to hide, and the other you want to hide first in. In my example, I took to hide recycle logo in Leonardo da Vinci portrait.


3. Create a new image the same size as your other two images and paste both your images onto it. The two images should be on two separate layers. Move the cover image layer above the hidden image layer.
Create a new layer and move it above the hidden image layer but below the cover image.


Fill ( Edit -> Fill ) this layer with the pattern you made in Step 1. Change the Blending Mode of this layer to “Exclusion”.


4. Change the Blending Mode of this layer to “Exclusion”.


5. Click on the image you want to hide on the Layer pallete, and invert the colors, by going "Image -> Adjustments -> Invert (or press Ctrl-I)"


6. Change to opacity of the cover image (in this Example, the Da Vinci layer) to change how well you can see the hidden image (Recycle logo)


as you can see, in my example I used 70% opacity.
here is the result:


That's it!
Great!