Start by opening the desired picture.
1. (Note the change we will make to example picture:)
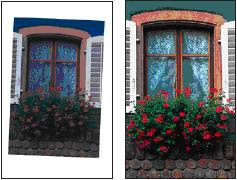
2. After you open the picture, from the toolbox select crop tool, and then in tool options bar type dimensions. Mark the picture, and then make sure the edges of the marker match edges of the picture. Then press Enter:

3. Select option Image/Adjustments/Levels, and you will get this window:
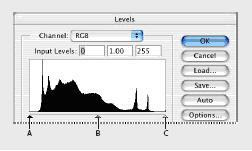
by moving one of three triangles, you adjust shadows, brighter, and darker tones..

when you are satisfied with values (in my case, input level values are: 18, 1.30, 232) click OK and save the picture.
4. You can also adjust auto contrast authomaticly, by using option Image/Adjustment/Auto Contrast. In this example, we wont use that.
5. Change the colors on Picture. Select rectangular marquee tool and select desired area. Select option Image/Adjustments/Replace Color.
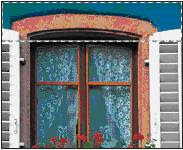
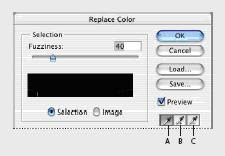
Select the first dropper tool, and click on any point on the color you want to replace. Now, click on middle eyedropper tool, and draw across other areas of the desired color, untill the whole selection in dialogue becomes white.
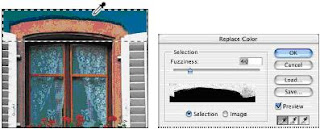
Adjust tolerance level to 80. By this, you adjust degree by which the connected colours will be included in mask. Click OK
6. Adjusting the light using dodge tool. Select dodge tool from toolbox. Input parameters as you wish. You have brush thickness, Range, and exposure.

Draw across desired object (curtains in this case), to sharpen them

7. Adjusting clearance by selecting sponge tool (behind dodge tool).
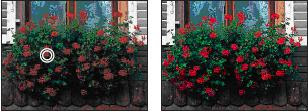
draw back and forth to brighten and make the color more clear.
8. We will end this lesson by using Unsharp Mask filter, that creates the ilusion of more focused picture. Select it from Filter/Sharpen/Unsharp mask.
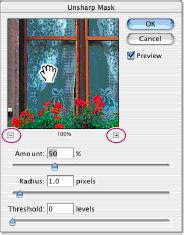
In the dialog box you will get preview of the picture so you can see effect your changes are having on picture.
Adjust given parameters untill you are satisfied with the results. Click OK. Save the file.
No comments:
Post a Comment