Node editor's displacement node from the lightwave official website.
Sunday, July 1, 2007
- Gimp - Lightning
In this tutorial you will learn the basics of how to create a nice lightning effect. Once you know the basics, you can easily experiment to create different kinds of lightning.
- Gimp - User Interface
This video explains the user interface of the GIMP. The goal of the tutorial is to make you understand how the user interface works, so that you can explore GIMP without being hindered by the user interface.
- Photoshop - Worhol-like images (Pop art in Photoshop)
Create Worhol-like pop-art in easy way!
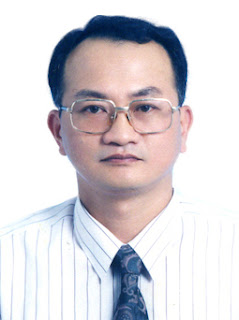
You can start with any image you like..
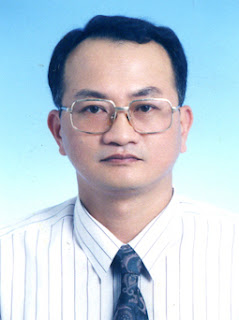
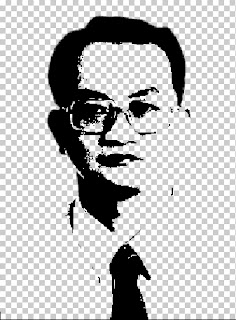
1. Isolate the portrait (picture) from the background by using "Filter -> Extract" from your menu bar. Then, you define edges, and fill in the picture you want to cut out.
You'll get something like this:
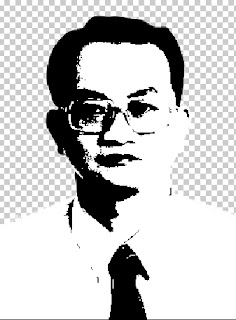
2. Go to "Image -> Adjustments -> Threshold", and move the slider left or right, untill you get satisfying picture...
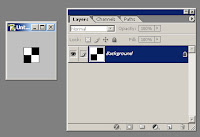
3. Duplicate this layer, and will it with white.
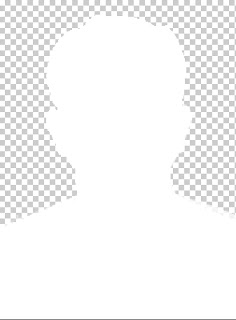
4. Go back to the black and white layer and remove the white. >Select>Color Range... Select the White, hit OK.. then Delete.
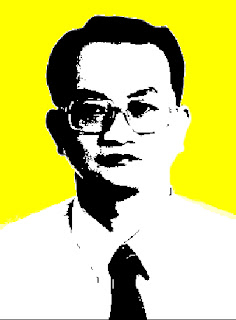
5. Create a new layer and fill it with a color. "Layers -> New Fill Layer -> Solid Color"
By modifying color of each of three layers, you should be able to test various color combinations...
6. If you do previous step several times, you should get something like this:
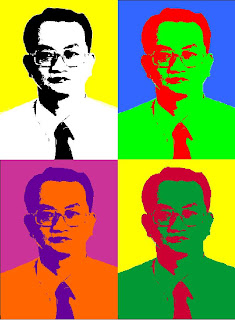
Have fun!
You can start with any image you like..

1. Isolate the portrait (picture) from the background by using "Filter -> Extract" from your menu bar. Then, you define edges, and fill in the picture you want to cut out.
You'll get something like this:

2. Go to "Image -> Adjustments -> Threshold", and move the slider left or right, untill you get satisfying picture...

3. Duplicate this layer, and will it with white.

4. Go back to the black and white layer and remove the white. >Select>Color Range... Select the White, hit OK.. then Delete.

5. Create a new layer and fill it with a color. "Layers -> New Fill Layer -> Solid Color"
By modifying color of each of three layers, you should be able to test various color combinations...

6. If you do previous step several times, you should get something like this:

Have fun!
- Photoshop - Recycled Da Vinci (Hiding picture within a picture)
Lear how to hide one picture within other!
Very practical and easy trick!
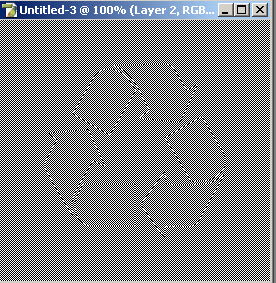
1. First, create a new image 2x2px and using the Pencil Tool (set to 1px), draw image as you can see it below.
Try to Zoom In ( View -> Zoom In ) to do it easier.
Define your pattern ( Edit -> Define Pattern ) and close the image.
2. Open two images. One you want to hide, and the other you want to hide first in. In my example, I took to hide recycle logo in Leonardo da Vinci portrait.

3. Create a new image the same size as your other two images and paste both your images onto it. The two images should be on two separate layers. Move the cover image layer above the hidden image layer.
Create a new layer and move it above the hidden image layer but below the cover image.
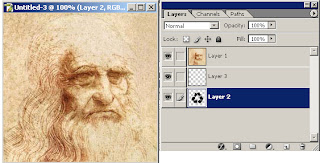
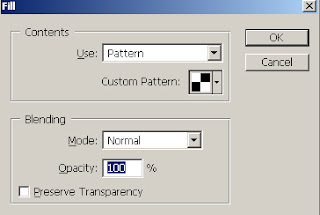
Fill ( Edit -> Fill ) this layer with the pattern you made in Step 1. Change the Blending Mode of this layer to “Exclusion”.
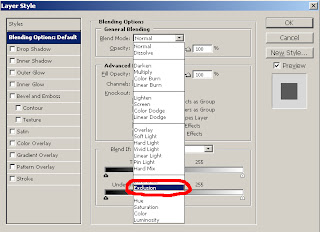
4. Change the Blending Mode of this layer to “Exclusion”.
5. Click on the image you want to hide on the Layer pallete, and invert the colors, by going "Image -> Adjustments -> Invert (or press Ctrl-I)"
6. Change to opacity of the cover image (in this Example, the Da Vinci layer) to change how well you can see the hidden image (Recycle logo)
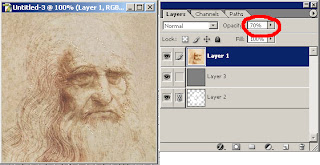
as you can see, in my example I used 70% opacity.
here is the result:
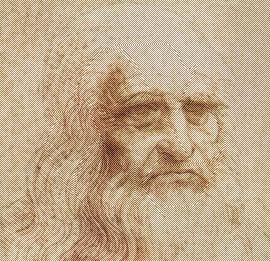
That's it!
Great!
Very practical and easy trick!
1. First, create a new image 2x2px and using the Pencil Tool (set to 1px), draw image as you can see it below.
Try to Zoom In ( View -> Zoom In ) to do it easier.

Define your pattern ( Edit -> Define Pattern ) and close the image.
2. Open two images. One you want to hide, and the other you want to hide first in. In my example, I took to hide recycle logo in Leonardo da Vinci portrait.

3. Create a new image the same size as your other two images and paste both your images onto it. The two images should be on two separate layers. Move the cover image layer above the hidden image layer.
Create a new layer and move it above the hidden image layer but below the cover image.

Fill ( Edit -> Fill ) this layer with the pattern you made in Step 1. Change the Blending Mode of this layer to “Exclusion”.

4. Change the Blending Mode of this layer to “Exclusion”.

5. Click on the image you want to hide on the Layer pallete, and invert the colors, by going "Image -> Adjustments -> Invert (or press Ctrl-I)"

6. Change to opacity of the cover image (in this Example, the Da Vinci layer) to change how well you can see the hidden image (Recycle logo)

as you can see, in my example I used 70% opacity.
here is the result:

That's it!
Great!
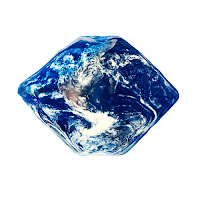
- Photoshop - Planet Earth Cube (Reshaping objects!)
This tutorial will teach you how to reshape litteraly any object in a simple way.
In this example we will take picture of the Planet Earth (round), and reshape it into a Square!
1. First, open starting image. In this case, I'll reshape picture of our Planet Earth.
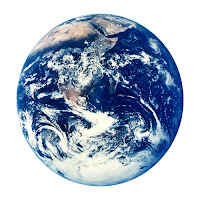
One of the things i will do is to play with a shadows a little, so to give our object sense of dimensionality.
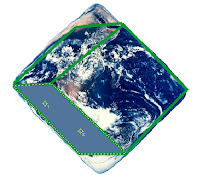
2. Second, we will start by simple reshaping, as it is usually easiest thing to do.
Go to "Filter -> Liquify" and start morphing.
Don't be frustrated if it is not perfect, as it is not the point of this step, but try to make it similar to the picture below.
3. Now that we have made our basic shape, we need to take care of the second part. If you have any shiny parts on you'r picture, you should flatten them out by using "healing brush".
As we do not have that type of problem, we can move to next step.
4. Here, it will be helpfull if you draw you'r square outlines on new layer on top of original picture, as to give you some guide in future steps.Also, don't worry if the picture doesen't fit perfectly into the square. See the picture below:
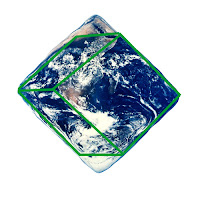 5. Now this step is going to further emphasize the role of light in completing the cubed effect. Using the guide layer above, get the polygonal lasso and select a single face of the cube as shown.
Next get the eye dropper and take a midtone color from that area. Next get the paint bucket tool and fill in the selected area on a new layer above the Planet earth. Your screen should now look something like this.
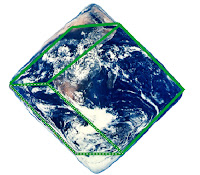
Do the same for each face on the cube.

As you usually don't need to blur top face, you can go to "Filter -> Blur -> Gaussian Blur".
When you are done blurring change the layer mode to "Overlay" and this will allow the detail of the image to show through while maintaining your adjustment to the light.
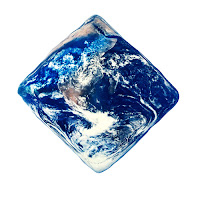
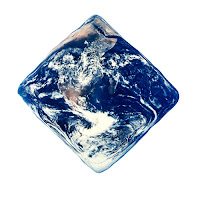
Final step is to load the image back into the Liquify Filter and adjust the cube once more so that all of the faces fit the dimension of a cube. After that, you can see the final result!
 Excellent!
In this example we will take picture of the Planet Earth (round), and reshape it into a Square!
1. First, open starting image. In this case, I'll reshape picture of our Planet Earth.

One of the things i will do is to play with a shadows a little, so to give our object sense of dimensionality.
2. Second, we will start by simple reshaping, as it is usually easiest thing to do.
Go to "Filter -> Liquify" and start morphing.
Don't be frustrated if it is not perfect, as it is not the point of this step, but try to make it similar to the picture below.

3. Now that we have made our basic shape, we need to take care of the second part. If you have any shiny parts on you'r picture, you should flatten them out by using "healing brush".
As we do not have that type of problem, we can move to next step.
4. Here, it will be helpfull if you draw you'r square outlines on new layer on top of original picture, as to give you some guide in future steps.Also, don't worry if the picture doesen't fit perfectly into the square. See the picture below:
 5. Now this step is going to further emphasize the role of light in completing the cubed effect. Using the guide layer above, get the polygonal lasso and select a single face of the cube as shown.
Next get the eye dropper and take a midtone color from that area. Next get the paint bucket tool and fill in the selected area on a new layer above the Planet earth. Your screen should now look something like this.

Do the same for each face on the cube.

As you usually don't need to blur top face, you can go to "Filter -> Blur -> Gaussian Blur".
When you are done blurring change the layer mode to "Overlay" and this will allow the detail of the image to show through while maintaining your adjustment to the light.

Final step is to load the image back into the Liquify Filter and adjust the cube once more so that all of the faces fit the dimension of a cube. After that, you can see the final result!
 Excellent!
Saturday, June 30, 2007
Subscribe to:
Posts (Atom)